When I moved into my current house over four years ago, it was brand new construction meeting the latest building standards. Over time, standards relating to efficiency have improved greatly, so I felt good about the efficiency of the house.
Of course, as I started to get to know my house I discovered quite a few areas where the standards could be improved upon, and one area that could easily save 500 gallons of water per month with less than $20 to $40 spent, and only 5 minutes of effort.
Water Is Cheap, Isn't It?
I'm assuming if you've read this far you are already interested in saving water. While water may be cheap in some parts of the world, there are arid areas where water is not so cheap. Where I live, for example, a 7000 gpm monthly usage, which is pretty good, is an $80 bill (including the sewer fee).And while we consume this water, ground water levels get deeper, and fissures and sink holes become more of a problem.
We can only expect rates to go up, but at the same time, more and more utilities are implementing conservation incentives. My utility gives a 65% discount on the consumption charge if we stay under 7000 gallons per month.
Low Flow Shower Heads
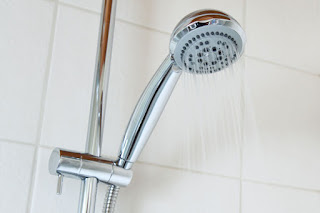
One example where the building standards could be improved was with the low flow showerheads that had been installed. The minimum requirement to be considered low flow is 2.5 gallons per minute (gpm) of water flow, which is what was installed.For a family of four taking 6 minute showers every day, that is 1800 gallons of water a month being used for showers. And face it - how often do you or your family members let the shower run two or three minutes to "warm up"? You could be looking at well over 2500 gallons per month!
Now imagine if you have an older standard shower head, using 5 gpm to 8 gpm! 7500 gallons of water is not out of the question at those rates, which would push someone in my area to the highest water rate tier.
All Low Flow Shower Heads Are Not Equal
Naively, I'd initially assumed that if we had low flow shower heads, then we were as good as we could be. Then I turned my brain on and realized there were probably different grades of low flow.A little bit of research revealed that low flow heads came in rates from 1.25 gpm to 2.5 gpm.
The first thing you should do is measure the rate of your shower head.
- Get a 1 gallon bucket
- Find a stop watch or clock with a minute hand.
- Run your shower at full rate and time how fast it takes to fill the 1 gallon bucket.
One side note, though - the flow rate can be affected by water pressure. Shower heads are rates assuming 80 psi. If your psi is higher or lower, you may see slightly different rates. For example, my 2.5 gpm shower head measured at 2.2 gpm when I timed it because my water pressure was less than 80 psi.
When I measured 2.2 gpm, I decided there was room for improvement, so I installed a 1.5 gpm shower head, and we're all very happy with its performance.
OK, So How Do I Save All That Water Too?
In the coming months we'll discuss a number of ways to save a TON of water, but for today I'm talking strictly about a five minute project of replacing your shower head.Note that while this maybe categorized as a plumbing project, it is about as simple of a plumbing project as anyone can undertake. It is basically only slightly more complicated than screwing in a light bub.
First, you'll need to pick out a shower head to use. I was quite happy with my Moen 2.5 gpm shower head that I originally had, and if you are not wanting to risk cutting your flow too much, you may try this Moen 2.5 GPM shower head.
 |
| Niagara Earth 1.5 GPM Showerhead |
When purchasing a shower head, take care to match the finish of your inlet pipe, if you care about aesthetics. Many heads come in chrome, white, brushed nickel, and other finishes.
Also note that you can purchase hand held shower heads in low flow varieties too. Niagara also makes a 1.5 GPM handheld showerhead.
What You Need
- An adjustable wrench.
- The new shower head
- Teflon Tape
- A short ladder.
How To Install A New Shower Head
- Turn off the shower. I know, that was obvious.
- See if you can unscrew the shower head from the inlet pipe. You might be able to do this by hand. If not, use an adjustable wrench. If your wrench has teeth or groves for gripping, you will want to wrap them with a cloth to avoid scratching the finish.
- Chances are teflon tape was used on the inlet pipe threads to form a tight seal. Remove as much of the tape as you can, and use a brush to get any additional tape residue off.
- Put a new wrapping of Teflon Tape around the threads of the inlet pipe. About 3 layers is all that is needed, and take care to pull it tight and ensure it doesn't block the pipe opening.
- Screw on the new shower head by hand. Once it is hand tight, turn it another 1/4 turn with your wrench, again taking care not to scratch the finish (see step 2).
- Enjoy!


Niagara showerheads are awesome...good call.
ReplyDelete